How To Create A Stunning DIY Ribbon Rose Bouquet: Step-by-Step Guide
Creating a DIY ribbon rose bouquet is not just about crafting—it’s about channeling your inner creativity into something truly breathtaking. Whether you’re planning a special occasion or simply want to add a touch of elegance to your home, this step-by-step guide will walk you through the process of making a stunning ribbon rose bouquet. So, let’s get started and turn those plain ribbons into works of art!
There’s something magical about crafting with your own hands. It’s like taking a simple material, like ribbon, and transforming it into something extraordinary. This guide will take you on a journey where you’ll learn how to create a ribbon rose bouquet that’s as unique as you are. No two bouquets will ever look the same, and that’s the beauty of DIY crafting.
Before we dive into the nitty-gritty details, let me tell you why this project is worth your time. Ribbon roses are timeless, versatile, and add a touch of sophistication to any setting. Plus, they’re budget-friendly and customizable. So, whether you’re a beginner or a seasoned crafter, this guide will help you create a masterpiece you’ll be proud of.
- Movierulzcom Telugu Your Ultimate Guide To Telugu Movies
- Telugu Movierulz The Ultimate Destination For Telugu Film Enthusiasts
What You’ll Need: Materials for Your Ribbon Rose Bouquet
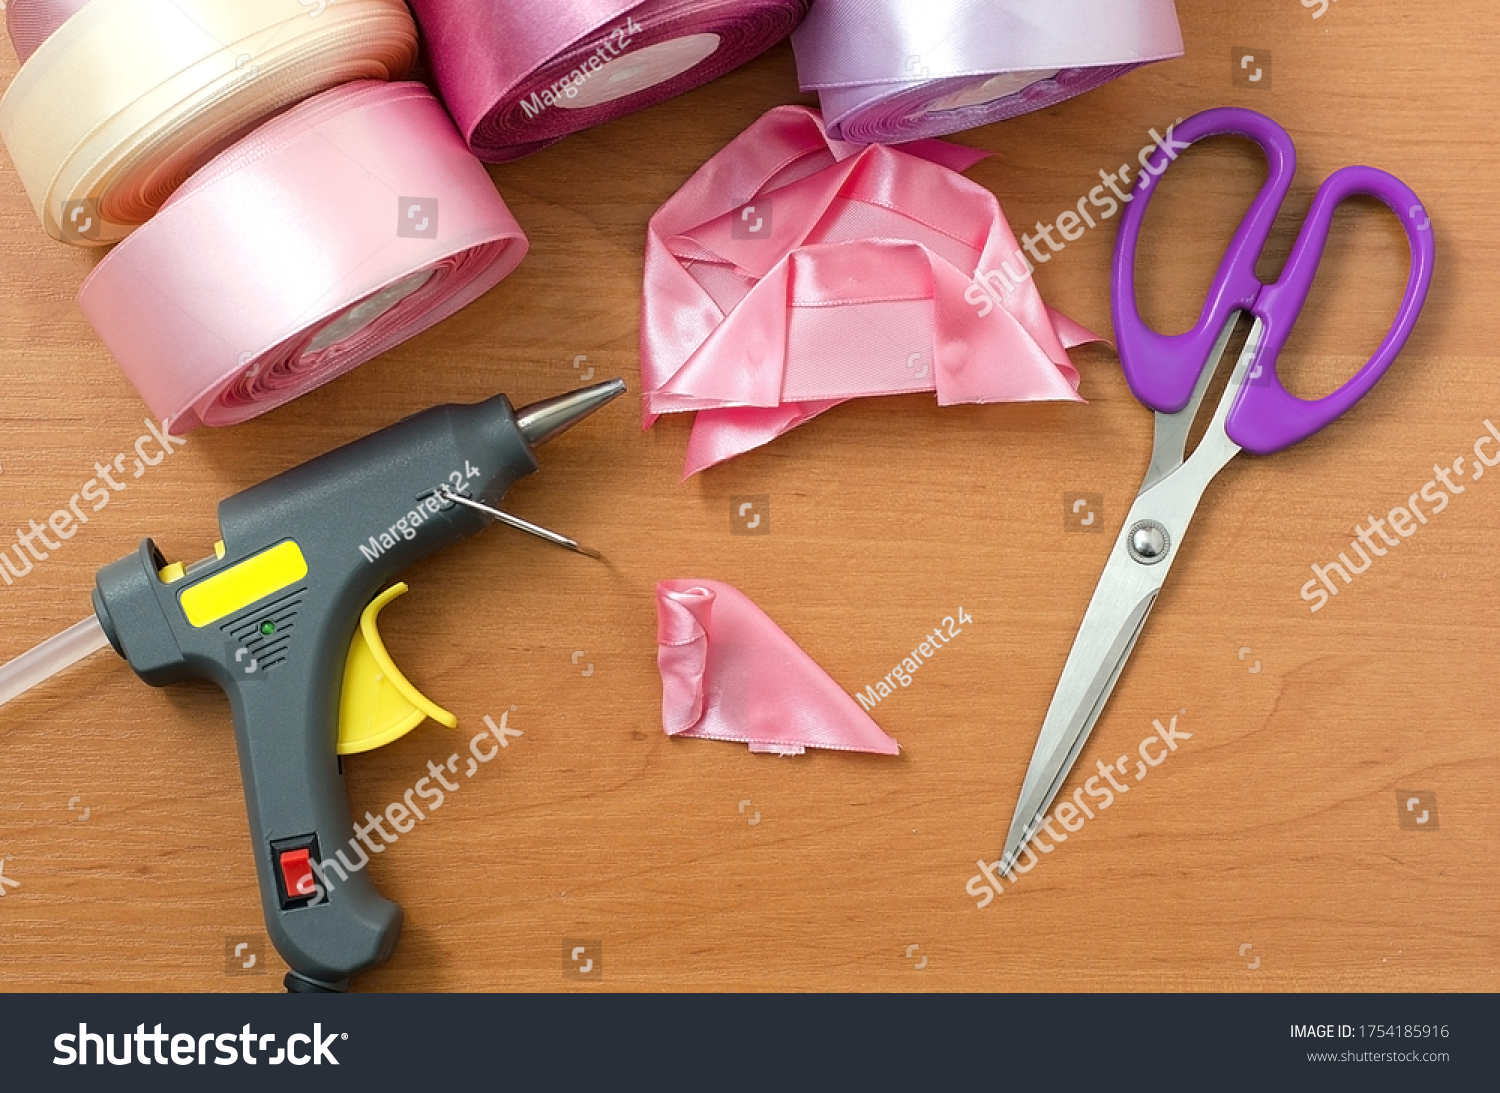
Every great project starts with the right tools and materials. Here’s what you’ll need to create your stunning DIY ribbon rose bouquet:
- Ribbon: Choose high-quality satin ribbons in your favorite colors. The width of the ribbon will depend on the size of the roses you want to create.
- Wire: Floral wire or pipe cleaners work great for adding structure to your roses.
- Hot Glue Gun: A must-have for attaching the ribbon petals securely.
- Scissors: Sharp scissors are essential for cutting the ribbon cleanly.
- Floral Tape: This will help wrap the stems of your roses neatly.
- Floral Foam: If you’re creating a bouquet with a base, this will hold everything together.
- Green Ribbon: For wrapping the stems and adding a finishing touch.
Don’t worry if you don’t have all these materials right away. You can always start with the basics and upgrade as you go. The key is to have fun and experiment with different textures and colors.
Step 1: Preparing Your Ribbon for Ribbon Roses
Now that you have your materials, it’s time to prepare your ribbon. This step is crucial because it sets the foundation for your roses. Here’s what you need to do:
- Tamil Movie Download Your Ultimate Guide To Exploring The World Of Tamil Cinema
- Movierulz Com Movies Download App Your Ultimate Guide To Streaming And Downloading Movies
Start by cutting your ribbon into strips. The length of each strip will depend on the size of the rose you want to create. For smaller roses, cut the ribbon into 6-inch strips. For larger roses, go for 10-12 inches. Remember, the longer the ribbon, the bigger the rose.
Next, fold each strip into a loop. This will create the petal shape. You can experiment with different folding techniques to achieve varying textures. Some crafters like to twist the ribbon slightly for a more natural look. It’s all about personal preference!
Pro Tip: Experiment with Different Ribbons
Not all ribbons are created equal. Satin ribbons are ideal for ribbon roses because they hold their shape well and have a luxurious sheen. However, don’t be afraid to try other types of ribbons, such as chiffon or organza, for a softer look. Mixing textures can add depth to your bouquet.
Step 2: Creating the Ribbon Rose Base
Once your ribbon is ready, it’s time to create the base of your rose. This is where the magic begins! Here’s how you can do it:
Take a piece of floral wire and wrap one end with floral tape. This will act as the stem of your rose. Then, take your first ribbon strip and secure it at the center of the wire using hot glue. This will serve as the center of your rose.
Now, start wrapping the ribbon around the center, layering each strip to create petals. Use your fingers to shape the petals as you go. This is where you can get creative and add your personal touch. Some people like their petals to be more uniform, while others prefer a wild, untamed look.
Common Mistakes to Avoid
One common mistake beginners make is using too much glue. While glue is essential, using too much can make your roses stiff and less realistic. Another mistake is not shaping the petals properly. Take your time and adjust each petal until it looks just right.
Step 3: Adding Layers to Your Ribbon Rose
Now that you have the base of your rose, it’s time to add layers. This step is what gives your rose its fullness and dimension. Here’s how you can do it:
Take another ribbon strip and start wrapping it around the base. Overlap each layer slightly to create a natural look. As you add more layers, your rose will begin to take shape. Don’t be afraid to experiment with different colors and textures to create a gradient effect.
Once you’ve added enough layers, trim the bottom of the rose to create a flat surface. This will make it easier to attach the rose to the bouquet later on. You can also use floral tape to wrap the stem for a cleaner finish.
Pro Tip: Use Different Colors for Added Interest
Using a variety of colors can make your bouquet pop. For example, you can create a gradient effect by starting with a light color at the center and gradually transitioning to a darker shade on the outer petals. This technique adds depth and visual interest to your bouquet.
Step 4: Assembling Your Ribbon Rose Bouquet
With your ribbon roses ready, it’s time to assemble your bouquet. This is the fun part where everything comes together. Here’s how you can do it:
Start by arranging your roses in a way that pleases you. You can mix and match different sizes and colors to create a balanced look. Once you’re happy with the arrangement, use floral tape to secure the stems together. This will hold your bouquet in place.
If you’re using floral foam, place it in a vase or container and insert the stems of your roses. This will keep your bouquet upright and stable. You can also add greenery or filler flowers to enhance the overall look.
How to Choose the Right Arrangement
When assembling your bouquet, think about the occasion and the setting. For a formal event, a symmetrical arrangement with uniform roses works well. For a more casual look, go for an asymmetrical arrangement with varying sizes and colors. The possibilities are endless!
Step 5: Finishing Touches
No bouquet is complete without finishing touches. Here’s how you can add the final details to your ribbon rose bouquet:
Use green ribbon to wrap the stems of your bouquet. This not only adds a decorative element but also hides any unsightly wires or tape. You can also add a bow or ribbon at the top of the bouquet for an extra touch of elegance.
Once your bouquet is finished, take a step back and admire your work. You’ve just created a stunning piece of art that’s completely unique to you. Isn’t that amazing?
Pro Tip: Experiment with Different Bows
Bows can add a playful or sophisticated touch to your bouquet. Try different shapes and sizes to see what works best for your design. A large bow can make a bold statement, while a small bow can add a delicate touch.
Expert Tips for Creating a Stunning Ribbon Rose Bouquet
Now that you’ve learned the basics, here are some expert tips to take your bouquet to the next level:
- Practice Makes Perfect: The more you practice, the better you’ll get at creating ribbon roses. Don’t be discouraged if your first few attempts don’t turn out perfectly.
- Invest in Quality Materials: High-quality ribbons and tools will make a big difference in the final result.
- Experiment with Colors and Textures: Don’t be afraid to try new things and push the boundaries of your creativity.
- Take Your Time: Crafting is a process, and rushing can lead to mistakes. Enjoy the journey and let your creativity flow.
Remember, the key to creating a stunning DIY ribbon rose bouquet is to have fun and let your imagination run wild. There’s no right or wrong way to do it, so embrace your individuality and create something truly special.
Common Questions About DIY Ribbon Rose Bouquets
Q: Can I Use Fabric Instead of Ribbon?
Absolutely! While ribbon is the most common material for ribbon roses, fabric can also work well. Just make sure it’s a lightweight fabric that holds its shape well.
Q: How Long Do Ribbon Roses Last?
Ribbon roses can last indefinitely if cared for properly. Unlike fresh flowers, they won’t wilt or fade over time. Just avoid exposing them to direct sunlight or moisture to keep them looking fresh.
Q: Can I Customize My Ribbon Rose Bouquet?
Of course! One of the best things about DIY projects is the ability to customize them to your liking. You can choose your favorite colors, textures, and arrangements to create a bouquet that’s uniquely yours.
Kesimpulan: Take Action and Create Your Own Ribbon Rose Bouquet
In conclusion, creating a stunning DIY ribbon rose bouquet is a rewarding and fulfilling experience. By following this step-by-step guide, you’ve learned how to prepare your materials, create ribbon roses, assemble your bouquet, and add finishing touches. Now it’s your turn to take action!
We encourage you to share your creations with us in the comments below. Whether you’re a beginner or a seasoned crafter, we’d love to see what you’ve made. Don’t forget to check out our other articles for more crafting inspiration and tips.
Happy crafting, and remember—your creativity knows no bounds!
Daftar Isi
- What You’ll Need: Materials for Your Ribbon Rose Bouquet
- Step 1: Preparing Your Ribbon for Ribbon Roses
- Step 2: Creating the Ribbon Rose Base
- Step 3: Adding Layers to Your Ribbon Rose
- Step 4: Assembling Your Ribbon Rose Bouquet
- Step 5: Finishing Touches
- Expert Tips for Creating a Stunning Ribbon Rose Bouquet
- Common Questions About DIY Ribbon Rose Bouquets
- Kesimpulan: Take Action and Create Your Own Ribbon Rose Bouquet
- Movierulz 2025 Download Your Ultimate Guide To Streaming And Downloading Movies
- Hdhub4u 2025 Download Your Ultimate Guide To Entertainment
Stepbystep Instruction Rose Made Satin Ribbon Stock Photo (Edit Now

DIY Ribbon Flower Bouquet

8 Roses Bouquet, Roses Bouquet, Satin Ribbon Rose Bouquet, Happy
